
Picture Editing in Photoshop
Some people have been asking how did you do that? Well… Most of the time I use Photoshop ver.5 for correcting lighting or taking out imperfections in the doll. Once an awhile I use something to support the doll. I can take out a Stance Modifier easier than a Doll Stand most of the time, but they have limitations on where you can hang them. Anyway I thought I would go through a difficult picture from my recent Hot Rod pictorial. Also your Photoshop version maybe different, but hopefully it has similar functions. This is not the only way you can correct a picture, for I am finding different ways to play with the picture all the time, this just happens to be the way I fixed this one 
First I start with the raw picture. This one has to much yellow from the florescent lights and blue from outside. also the modifier and blemishes on the doll need cleaning up.
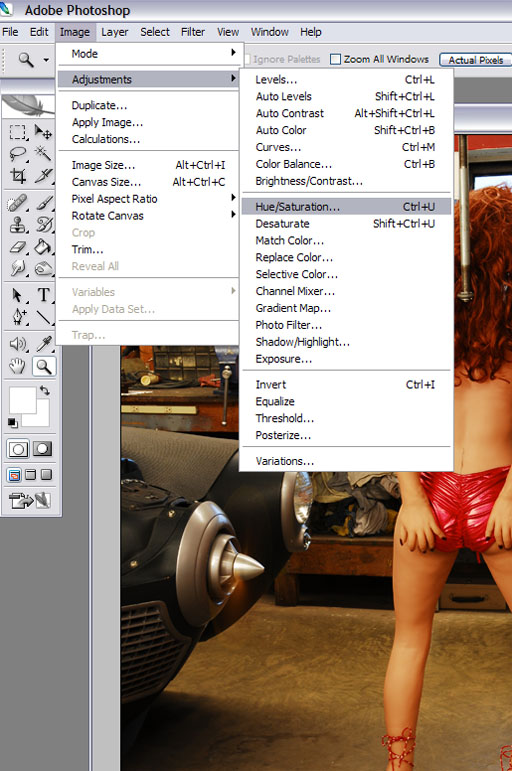
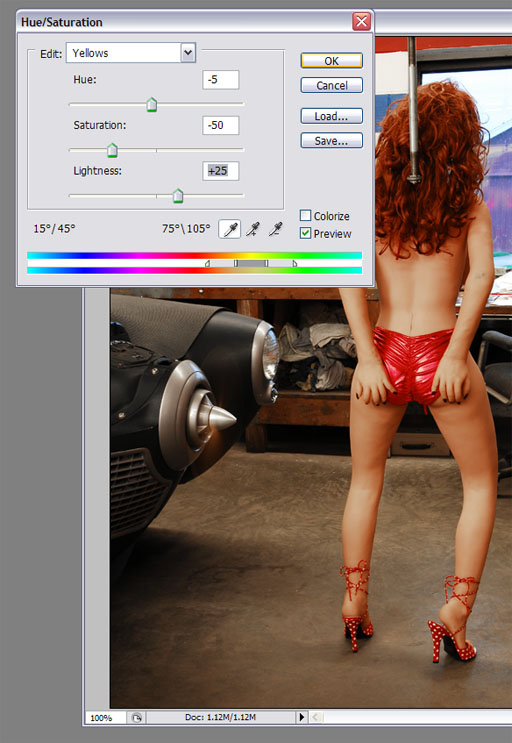
To correct the lighting go to the top and select ‘image’ then drop to ‘adjust’ then click on Hue/Saturation. For this picture we want to reduce the yellow so click on the yellow, now slide the Hue left to -5, the Saturation to -50, and the brightness to +25. This will make the colors more natural looking. Play with the slides to the extreme to find the happy medium.
Next I want to remove the Stance Modifier. Start by selecting the stamp tool by clicking on the box, or typing the letter S. You also want to select the brush size. For this picture I chose 35%
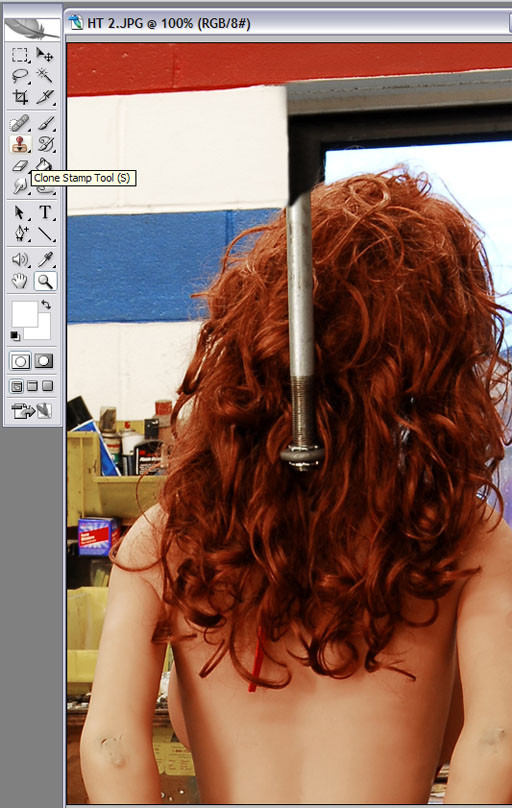
Starting at the top of the picture, at the edge of the window opening with the red, put the icon on the edge and hold the ‘Alt’ button and click the mouse. Then move left about an inch and click on the edge again. Hold the mouse button down while stamping to see if it looks even, if not hit ‘Ctrl Z’ and try again. Once it looks even erase as much as you can before picking another point. Keep doing this to erase the modifier. Stop the erasing by letting go of the mouse. If it looks good, keep going . If you don’t like it hit the ‘Ctrl Z’ and try again. You only get one shot between mouse clicks, otherwise you will have to pick up from a different point. Keep doing this till the modifier is erased down to the hair.
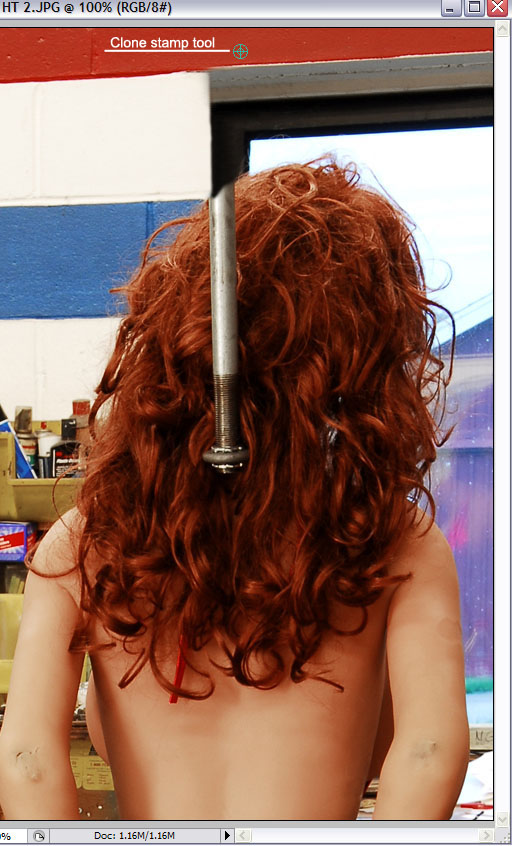
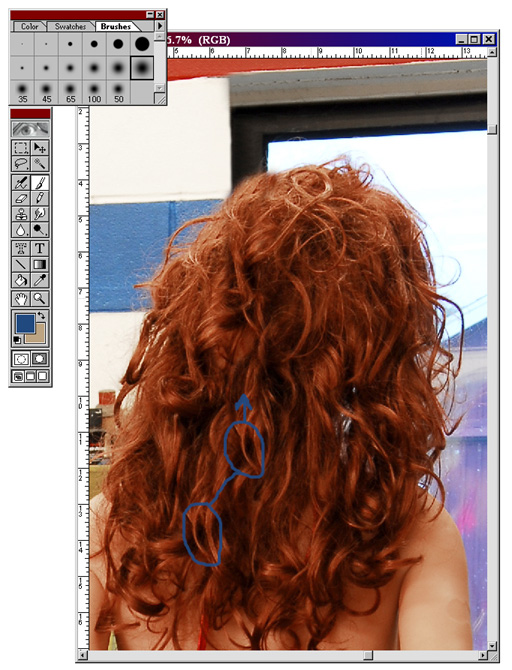
With the hair, pick an area that closely matches the area where the modifier is. I picked near the bottom left, now like the last, pick in the bottom circle with the stamp, then click on the modifier and erase. Just erase the modifier in one shot. After go back and pick from other areas to fill where the modifier was. This way the hair will look different instead of a mirror image all the way along where the modifier was.
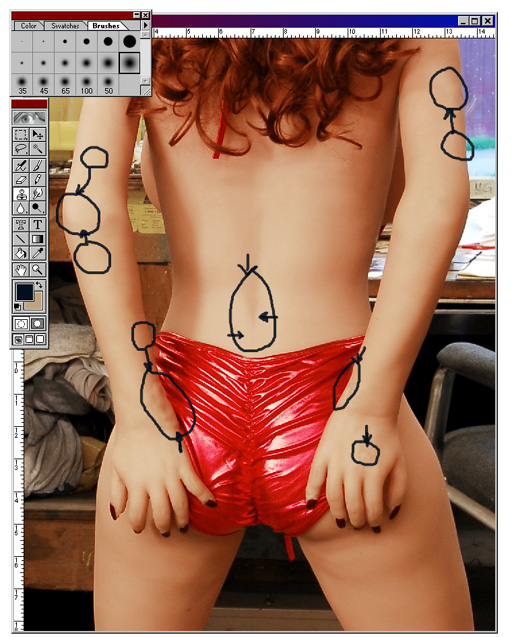
Moving down the back clean up the same way as the modifier. Pick from areas near that have the same color, or shading. The larger the brush the better for open areas. Narrow the brush down along edges. I took out the void on her right upper arm, the elbows, and her back operation. The arrows show where I picked and moved to. Next is the wrists.
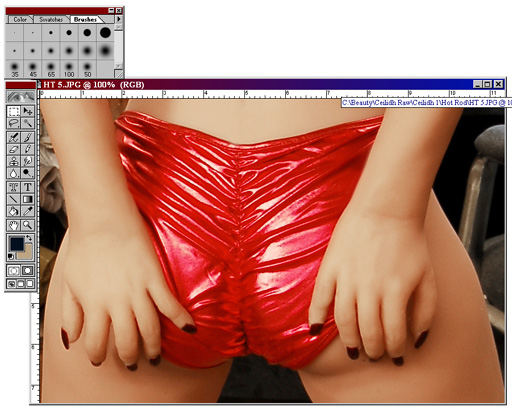
Here are the edited wrists
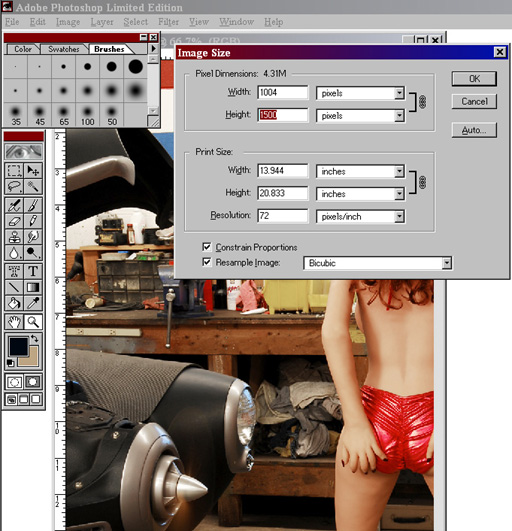
I did a little work on the legs and ankles the same way as before. After you’re happy with the changes save your work. Next you need to resize for your album in the forum. For a blog you would want your picture to be 512 pixels wide. Do this by selecting ‘Image’ at the top, scrolling down to ‘Image Size’ and select 512 pixels. My album on the forum I make them a bit bigger but go by 12″ on the longest side. Since I have more room here I make them 1500 pixels on the longest side. That is what it is set for in this picture.
There you have it. That is basically how I clean up a picture. I’m sure your manual will tell you all the nifty things you can do with your version, and by all means have fun playing. But by getting the lighting correct, and the extra stuff out, this will give you a good start.
Look in my album for the big pictures.